Author Topic: MONUMENT TO THE 2-STROKE, PART 2 - FINAL ASSEMBLY  (Read 24574 times)

0 Members and 2 Guests are viewing this topic.

Offline 454SS

  • Jr. Member
  • **
  • Posts: 38
Re: MONUMENT TO THE 2-STROKE, PART 2 - FINAL ASSEMBLY
« Reply #45 on: June 18, 2011, 09:48:17 AM »
Yeah check that paint isn't fouling a ground.  Been there after a rebuild involving repainting the frame.

Offline delphipro5

  • Sr. Member
  • ****
  • Posts: 262
Re: MONUMENT TO THE 2-STROKE, PART 2 - FINAL ASSEMBLY
« Reply #46 on: June 18, 2011, 01:24:26 PM »
Went back today and really looked into it, wiggled the wires real good, waved my magic wand :wink:... and vahlla! Good bright well timed spark!! Don't ask me what I did but I got it workin :-D So on to the next head skratcher i guess! Promise not to post till I have made some real progress! Been having trouble finding the time to feed myself latley! Not enough hours in the day! Time to scrounge up some din din.

Offline sniper1

  • Full Member
  • ***
  • Posts: 238
Re: MONUMENT TO THE 2-STROKE, PART 2 - FINAL ASSEMBLY
« Reply #47 on: June 18, 2011, 02:17:21 PM »
        Sure does look purdy delphi and the finished product will be well worth it for years of trouble free riding :) I see you have a chain slider what brand did you use?
Just an old guy that enjoys going fast, I was in the army for 6 years and bought my first K5 when I returned from basic training. I raced a yz60 from age 6 to 8  a kx80 from 8 to 12  a kx125 from 12-17 intermediate class on k5 which I've owned 3.

Motorrad

  • Guest
Re: MONUMENT TO THE 2-STROKE, PART 2 - FINAL ASSEMBLY
« Reply #48 on: June 18, 2011, 03:37:05 PM »
Mine had several bad connections in those junky bullet connectors...   Redid all connections with marine grade spade lock...

Offline Polar-Bus

  • Hero Member
  • *****
  • Posts: 1,023
Re: MONUMENT TO THE 2-STROKE, PART 2 - FINAL ASSEMBLY
« Reply #49 on: June 19, 2011, 12:32:45 AM »
A friendly tip from experience :

Always make sure you have a tight bullit connection. Sometimes the female connector can get "spread open"   :-D  and cause  a suspect connection. I also strongly recommend silicone die-electric grease on all your connections !
01' KX500
'84 GPz1100
'87 GSX-R  750
'06 HD Fatboy
'73 Kawi H1
'03 CRG KX500 Shifter kart

Offline delphipro5

  • Sr. Member
  • ****
  • Posts: 262
Re: MONUMENT TO THE 2-STROKE, PART 2 - FINAL ASSEMBLY
« Reply #50 on: June 24, 2011, 04:29:22 PM »

Flushed and bled brakes. VERY positive response now!

Break guards on.

FINALLY, it's down off the stand. It's first steps as a newborn. :-D
Crank vent filter, billet oil plug. OVERKILL! :-D
Radiator overflow filter. OVERKILL!  :lol:
Extra fuel line filter. OVERKILL!   :roll:
I have a filter on EVERY vent and fuel hose on this bike! :lol: :roll:
ITS GETTING THERE!

It looks plain without the stickers I plan on putting on. Controls came out really nice, looks killer. Still waiting on my muffler and steering damper to come home on the brown truck. And getting the spacer for the ign. cover soon so the nice factory racing cover will go on instead of the plastic stockie. Pipe is going on tomorrow, filled the tranny with oil today so I don't forget it!!! :wink: Lot more tweeking and fiddling to do though, I'd say 12 more days and this beast will roar. :evil:

Offline Friar-Tuck

  • Hero Member
  • *****
  • Posts: 1,827
  • \o/ Live Free or Die
Re: MONUMENT TO THE 2-STROKE, PART 2 - FINAL ASSEMBLY
« Reply #51 on: June 24, 2011, 04:56:37 PM »
 :-D
  Very Nice!
    I would hate to get her dirty, But I couldn't wait to take her out and see what she could do! :lol:
       Tuck\o/
"The Truth Has No Agenda"

Offline 81cr450

  • Hero Member
  • *****
  • Posts: 887
Re: MONUMENT TO THE 2-STROKE, PART 2 - FINAL ASSEMBLY
« Reply #52 on: June 24, 2011, 05:33:15 PM »
Beautiful , stickers are overrated. X2 on dielectric, keeps things from corroding. The old blue fork shells would go voondebah
if I only had a pair, I could actually ride this thing

& to the people I like  FYYFF

Offline delphipro5

  • Sr. Member
  • ****
  • Posts: 262
Re: MONUMENT TO THE 2-STROKE, PART 2 - FINAL ASSEMBLY
« Reply #53 on: June 25, 2011, 02:16:58 PM »
PIPE WENT ON LIKE BBUUTTAAHH!! :lol:


MOUNTED RIGHT UP NO PROBLEM.

Check out my fancy shmancy kill button! Little tough to get to in a hairy situation but I like the look of it on the break side. :roll:


 :-o :-D I AM GIDDIE WITH ANTICIPATION AT THIS POINT. LOOKS LIKE IT WILL BE RUNNING SOONER THAT I THOUGHT!  :evil: :evil:
Will try to post a high quality video of it running(probably on youtube.) with the best audio I can get on it, so you can really hear what it sounds like.
COMING SOON!

Offline sniper1

  • Full Member
  • ***
  • Posts: 238
Re: MONUMENT TO THE 2-STROKE, PART 2 - FINAL ASSEMBLY
« Reply #54 on: June 25, 2011, 02:20:44 PM »
         Outstanding delphi and I am looking at those hoses right now very sharp keep up the good work.
Just an old guy that enjoys going fast, I was in the army for 6 years and bought my first K5 when I returned from basic training. I raced a yz60 from age 6 to 8  a kx80 from 8 to 12  a kx125 from 12-17 intermediate class on k5 which I've owned 3.

Offline delphipro5

  • Sr. Member
  • ****
  • Posts: 262
Re: MONUMENT TO THE 2-STROKE, PART 2 - FINAL ASSEMBLY
« Reply #55 on: June 27, 2011, 01:25:41 PM »
Got my P.C. spark arrestor/muffler back from Bristol-Core. Sent it to them for a re-pack, and so they could set up a kit for this type of muffler. Good hook up from sniper1. I will give a good review of the product here on this site soon. Thinking of sending them my oem muff so they can make a kit for that too.
This packing is QUALITY! I can already tell. Thinking of having my oem muff. cut down 4-5" too. With this packing you could get away with it without being way too loud! Good stuff.

Still waiting on a few last requests such as my S. damper. It had to go back to Scotts for a base-valve replace. VERY STRANGE! I have no idea what happened to it. I barely even had it out of the box! :? But it's fixed and will be here on Wed. I believe.

And, I have a machining place making a spacer for the ign. cover so I can use the boyesen cover with the steathy flywheel weight... I went there today, my drawing and my pipe(brought that too, to have the crack welded) Are still sitting on the floor where I left them! Too busy to get to it I guess... It's been weeks. :x
BUT I DONT NEED ANY OF THAT TO START IT UP AND BREAK IT IN SO THAT I WILL BE DOING VERY SOON.

Offline delphipro5

  • Sr. Member
  • ****
  • Posts: 262
Re: MONUMENT TO THE 2-STROKE, PART 2 - FINAL ASSEMBLY
« Reply #56 on: June 28, 2011, 11:53:03 AM »
Had a crazy day today. No time. Got my damper back and installed. works good on the stand. :-D

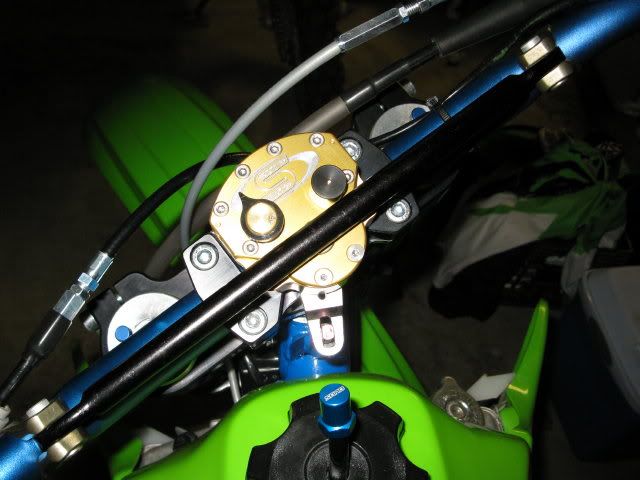
And no the crossbar does not contact the damper at all. so it shoud be ok with these bars. It is a TIGHT FIT though! :wink:


BUT I HAVE AN ISSUE (AGAIN)...


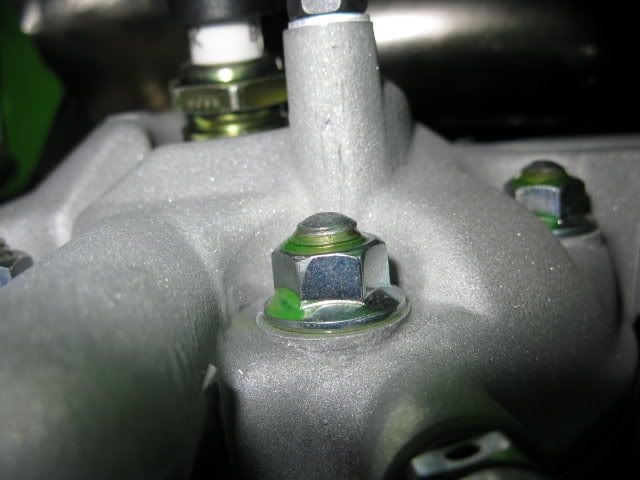
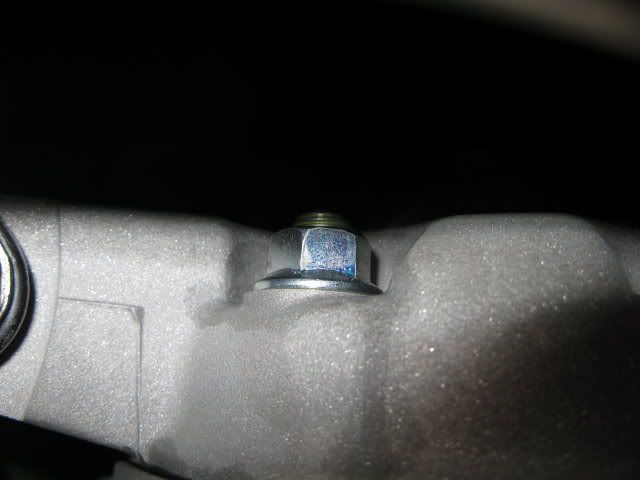
Filled it up with coolant the other day and now it is leaking from 4 of the 9 head studs. :?
Keep in mind this is a brand new build that has not been run yet... So I am wondering if maybe I should not have put the coolant in till I was ready to start it up and warm things up.

What I am asking is- Is this a problem that will go away once I have broken it in a bit and got everything warmed up and seated in place. OR... Is this serious cause for concern that should be adressed NOW BEFORE I FIRE IT UP? :?
Hope you guys can give me a little input here. I popped the rad. cap to see how much I had lost and it's not much at all. So at least I know my cylinder is not filled to the brim with coolant! :? :x :?

I DID SOME MORE RESERCH ON HERE AND IT SEEMS OTHERS HAVE HAD THIS PROBLEM TOO. I'm thinkin' runna and retighten head nuts after break-in.
I did mount the engine in the frame and tourqed the frame to head mount prior to doing anything else. Could this be the problem? If so, what would the fix be? loosen head mount and retourqe head nuts, then tighten mount again? :?
SHOULD I BE WORRIED? BECAUSE AT THIS POINT I'M NOT REALLY :lol:     !!!!HELP!!!!
« Last Edit: June 28, 2011, 12:27:14 PM by delphipro5 »

Offline Marco810

  • Full Member
  • ***
  • Posts: 174
Re: MONUMENT TO THE 2-STROKE, PART 2 - FINAL ASSEMBLY
« Reply #57 on: June 28, 2011, 01:36:48 PM »
Never seen that happen after a fresh gasket, especially without the bike even running. I can only see the problem getting worse once it starts building up pressure. Did you lap the head?

Offline 2-Stroke Tom

  • Full Member
  • ***
  • Posts: 160
Re: MONUMENT TO THE 2-STROKE, PART 2 - FINAL ASSEMBLY
« Reply #58 on: June 28, 2011, 01:42:59 PM »
Loosen the mount and then torque the head in the proper sequence and to the proper torque. The head gasket is easy to replace if it leaks after you start it. If it leaks now, it will only get worse when in runs since added heat means added pressure. PV=nRt for those engineering folk

Offline weymouth399

  • Full Member
  • ***
  • Posts: 123
Re: MONUMENT TO THE 2-STROKE, PART 2 - FINAL ASSEMBLY
« Reply #59 on: June 28, 2011, 02:36:43 PM »
Pull the head back off, pull the studs back out. Now when installing the studs use a quality thread sealant. (On the side that goes into cyl)
Put the head back on and I bet your problem goes away.

Bob W
93 KX500 ice bike for sale
00 KX 500 ice/dirt
04 KDX220 dirt
04 Kx 500 ice bike
08 KLX 450 on/off
72CT90x2 for sale
76LB80Chappy
86FJ1200
89FJ1200