Author Topic: '09 500AF build  (Read 194713 times)

0 Members and 1 Guest are viewing this topic.

Offline jBernard

  • Sr. Member
  • ****
  • Posts: 299
Re: '09 500AF build
« Reply #165 on: May 27, 2015, 07:03:47 AM »
Bummer. Well, it's probably for the best anyway.

+ i didnt want to pay 350$ for heat treating either.

$350... ouch! Who was that through?

the guys that do Christini's frames up in PA. sounded super high, never shopped around after that quote.
dont know how 'true' it is but the guy said that they have a specific way the hang the frames to prevent warping/distorting. *maybe* another heat treater wouldnt take as much care with that aspect and thus cheaper? dont know.
'09 KX500AF - never ending project
'14 KTM 300SX

Offline crooscroos

  • Full Member
  • ***
  • Posts: 51
Re: '09 500AF build
« Reply #166 on: May 27, 2015, 08:42:10 AM »
I had a friend of mine who does powder coating heat treat my frame. He only charged $40 as the heat treating process is fairly simple!

Offline jBernard

  • Sr. Member
  • ****
  • Posts: 299
Re: '09 500AF build
« Reply #167 on: May 27, 2015, 08:50:41 AM »
I had a friend of mine who does powder coating heat treat my frame. He only charged $40 as the heat treating process is fairly simple!

if he used his powdercoat oven, thats not really heat treating, more like aging.
solution heat treatment is pretty involved process. at high temps at 1000* F

"


Solution treating is typically performed in the 450 to 575°C (842 to 1067°F) range in air, followed by rapid quenching into cold water, hot water, boiling water (-T61 temper), water-polymer (glycol) solution, water spray or forced air. Natural aging to the T4 temper will occur at ambient temperature for 2XXX, 6XXX, 2XX and 3XX alloys, with most reaching a stable temper after 96 hours. Artificial aging in the 93 to 245°C (199 to 473°F) range is utilised to meet the T6 and T7X tempers.

Immediately after quenching from solution treating, all alloys are relatively soft and can be moderately formed or straightened if performed within a couple of hours. These alloys will naturally age harden at ambient temperature, with their hardness gradually increasing with time following quenching. This can be suppressed by refrigeration below about 0°C (32°F) if it is desired to form or straighten the material more than a couple of hours after quench. Cooling to below about minus 23°C (minus 10°F) or colder is required to retain the As-Quenched (AQ) temper for prolonged storage times beyond a few days.

For maximum formability prior to solution treating and aging, these alloys must be fully annealed to produce a stable dead soft O temper by heating in the 400 to 425°C (752 to 797°F) range, then slow cooling (28°C or 50°F per hour or slower) to below 235°C (455°F), formed, then solution is treated and aged.
"
'09 KX500AF - never ending project
'14 KTM 300SX

Offline SS109

  • Full Member
  • ***
  • Posts: 92
  • KDX fanatic!
Re: '09 500AF build
« Reply #168 on: May 28, 2015, 08:07:31 AM »
the guys that do Christini's frames up in PA. sounded super high, never shopped around after that quote.
dont know how 'true' it is but the guy said that they have a specific way the hang the frames to prevent warping/distorting. *maybe* another heat treater wouldnt take as much care with that aspect and thus cheaper? dont know.

Thanks for the info. BTW, with the pieces you are having made, how are you avoiding the heat treating? If you weld the pieces in then wouldn't you lose the temper of the aluminum in proximity of the welds so it would still need to be heat treated?
'90 KDX 200 (rebuild - DONE!) - '94 KDX 250 (soon to be a KDX250af)

Offline crooscroos

  • Full Member
  • ***
  • Posts: 51
Re: '09 500AF build
« Reply #169 on: May 28, 2015, 08:37:07 AM »
jBernard, thanks for all of the useful information! Are there any benefits to simply aging the aluminum?

Offline Curtin388

  • Newbie
  • *
  • Posts: 1
Re: '09 500AF build
« Reply #170 on: August 23, 2015, 12:57:20 AM »
This is the best motorcycle build I have ever seen jbernard your work is amazing mate! Thank you everyone for all the great tips I am currently doing a 2009 kx 250f frame with a kx 500 engine this chat has helped me tremendously thank you all

Offline jBernard

  • Sr. Member
  • ****
  • Posts: 299
Re: '09 500AF build
« Reply #171 on: October 07, 2015, 12:47:10 PM »
Thanks for the kind words guys.

Sorry for the massive delay. The frame/engine mount alignment issue REALLY took the wind out of my sails for a bit. Very discouraging to have something that is starting to look like a complete bike then have to go back and chop it all out. A few guys said to just take a larger drill and drill out the thru holes to compensate for the misalignment. While this would probably get me going, I dont like to do things like that and decide to chop it all out (except for the yoke) and do it BETTER than I've ever seen done.

Actually took a while to find someone local that could help me out on the cheap and had some burrs and a high hp compressor to dig out all the old frame rail pieces from the yoke and bottom part of the frame without destroying it. Finally got that done.

Then I ran into the issue of how to find out the actual angle of the bent tubing. If you can imagine. being off a couple degrees on the bend, then measuring 6" down the line and its off a LOT.
Thought about getting a cheapie digital protractor/angle finder. Would cost me 100$ and not sure if it would do the job, so ended up getting the tube 3d scanned with a Faro Arm to get the angle figured out.

Here's where i am now. Have to figure out the dimenisions for the offset piece since the width between rails at the yoke is different than the width between rails at the lower frame junction. This was another cause of this crap in the first place. if the tubes are bent and 'toe'd' in to fit the angle, then when you put a motor mount on the rail thats square, it is then OFF angle to the engine.

Here's how i'm going to solve it. have 2 piece CNC rail system. 1 solid piece from yoke to right behind the bottom mount, then an offset stubby piece that does the bend into the lower frame section. Should work perfect.

I've gotten a bit done, and fixed, and bought, so I promise an update very soon. Big things on the horizon.

And a teaser pic of a trick part i got my hands on as well....


'09 KX500AF - never ending project
'14 KTM 300SX

Offline jBernard

  • Sr. Member
  • ****
  • Posts: 299
Re: '09 500AF build
« Reply #172 on: October 18, 2015, 10:36:32 AM »

Hey all. A few more updates from this last week of getting to work on the 500 a bit...

So I had originally bought some Applied 20mm KXF clamps for the bike before I had the A kit. When I got ahold of the AKit it came with some used PC clamps. they were pretty blasted from sand and anodizing was worn off a good bit, so I sent them to get stripped and re-ano'd. Well, turns out, there were a ton of hairline cracks in the bottom clamp. So those had to end up being scrapped unfortunately.
I had that HPSD adapter welded onto the bottom of my Applied clamps by this point, so I ended up sending them back to Applied to hopefully be able to get them bored out to A Kit hole dimensions.
They were barely able to do it (way the clamp bolts are close to the hole) but pulled it off, then sent to get anodized. Got them back and have been battling ever since with the fork fitment for some reason. Both clamps by themselves slide over the tubes fine, but when going thru the stem and both clamps, it takes some forcing to get the forks to slide thru the top clamps. Knew something was up here. Thought they may have misplaced a clamp and sent back a different offset mix-matched or something. Turns out, there was a little weld on the bottom of the lower clamp when i put the HPSD adapter on, and the guy working there at the time didnt check to make sure the clamp was flat in the mill before boring. So it added another angle to the offset basically, just enough to mess things up when you tried to put it thru the top.
Figured out the issue, Applied was awesome dealing with me, super good guys. Re-made me a lower clamp and we did a different take on the HPSD design as well, pretty trick. Bolt on design vs weld on so saved me a trip to the welder.
Now after another HPSD top bracket revision, forks fit up perfectly, new bottom clamp, and HPSD is fitting perfectly with enough free play on both ends.


The fork tubes are weird sizes at the flange near the dust seal. Had to have Kevin @ Tamer Holeshot Devices send me a handful of tube clamps to try and test fitment. Turns out one off an older KTM fits up pretty well. Test fitment on the stock fork guards just for kicks. I'll be making some out of carbon fiber for this project.


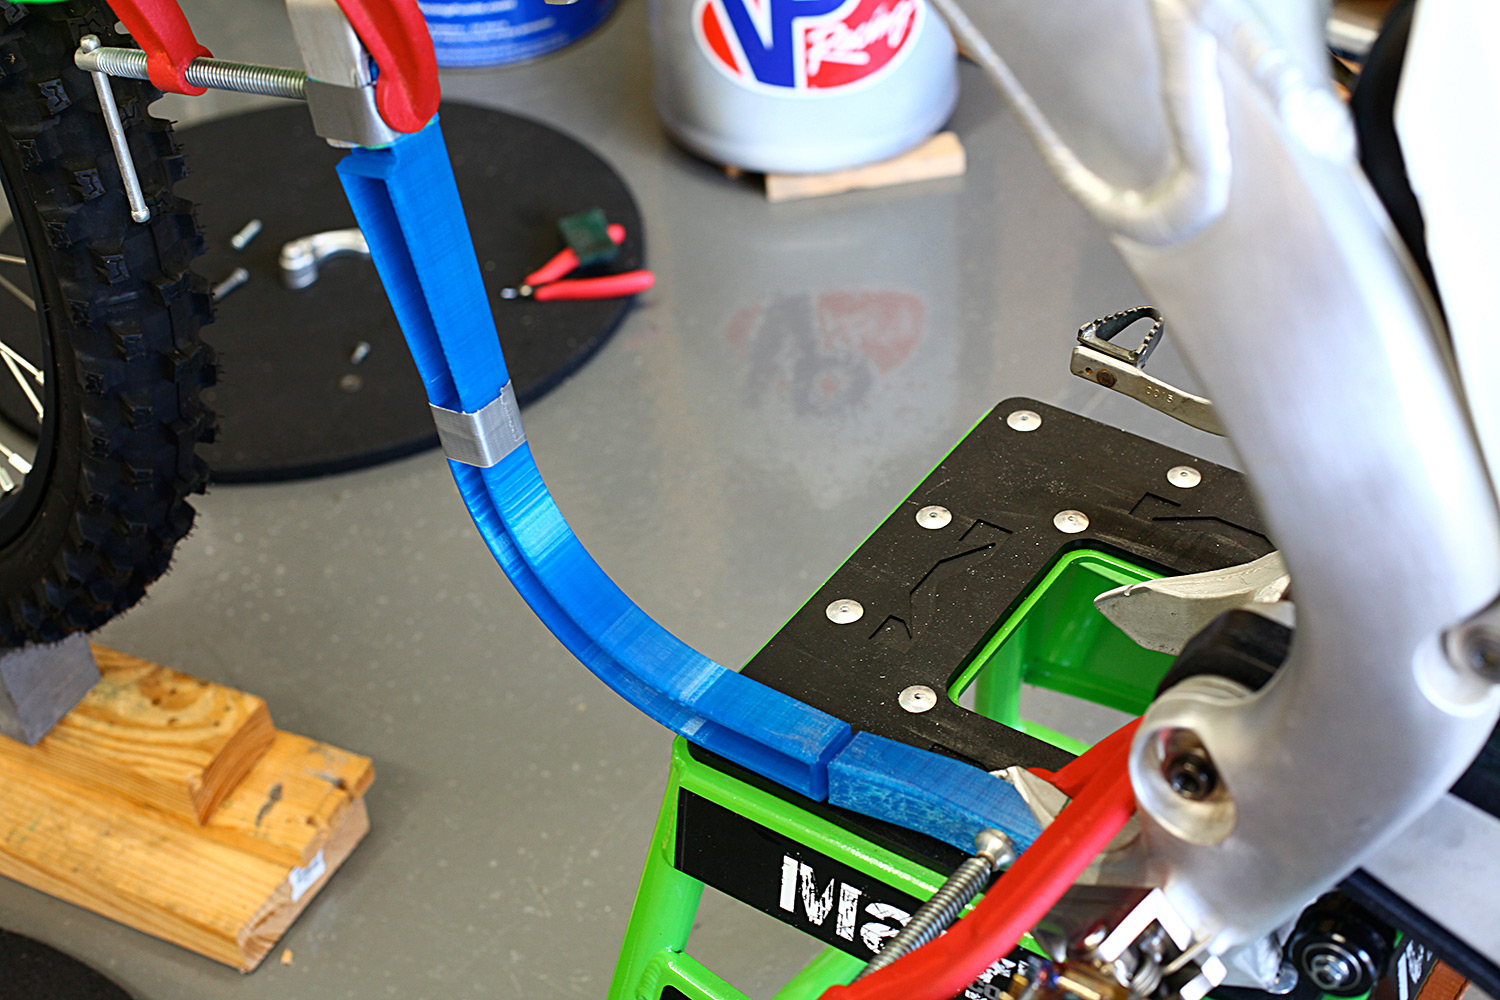
Looks like my measurements on the frame rails turned out to be spot on. maybe .008" off but that is PLENTY close enough for this. You can see in the overhead shot where i put the bend in to reach out to the different width near the swingarm receptacles.
This is good to go, going to put in the weight relief recesses like I did on the Yoke on the inside of the rails, then get this thing sent off to get CNC'd. I'll have to wait till i get the frame rails welded in, before I can make the new top and bottom engine mounts though, as all 4 are different 'widths' to mate up to the engine cases perfectly.


Still working on getting the front and rear brake caliper adapters modeled up, as its a pretty fair amount of work, but getting closer.
Thought that just running the brembo rear caliper and using the stock nissin rear master cylinder was a bit half assed, but the issue is the bolt pattern spacing on the two master cylinders is different.
Shaved the stock mount off the frame, measured up a new one that fits the brembo, and test printed the adapter, fits perfectly. Should be pretty easy to tack on, then not use any filler on the face, and smooth it out so it looks stock.


Playing around with an idea for the front cable stay, rather than the ghetto looking white plastic loop that comes on the bike.
Made this up real quick, Wanted a cable stay that mimic'd the lines of the front number plate, sort of like how the KTM design is done. I got close on this initial one but it needs to standoff a bit more from the clamps. Should be an easy revision. I also put a recess on the back of the part so it snaps in tight fitment to the triple clamp bolt standoff, this keeps it from twisting.


Got a few new parts in. Lightspeed CF chain guide, and Yoshimura factory edition axle blocks in matte black.


And a cool Yoshimura stem nut as well in matte black.


CRF Killswitch


Probably my most adventurous aspect of this bike may be the subframe. Wanting to do a carbon fiber design, and use the air filter style off a KTM since its so amazing and minimal.
Got in a '14 125SX airbox, and chopped out the filter/intake/boot. Plans are to mesh this design in with the CF subframe so its 1 piece, and using a KTM rubber boot design as well.


Thanks for the continued support and I'll be posting more updates as soon as I can.
Taylor


« Last Edit: October 18, 2015, 10:39:15 AM by jBernard »
'09 KX500AF - never ending project
'14 KTM 300SX

Offline Foxx4Beaver

  • Hero Member
  • *****
  • Posts: 8,952
  • James Stewart DID NOT invent the scrub!!..JoJo
Re: '09 500AF build
« Reply #173 on: October 18, 2015, 10:40:09 AM »
diggin that front cable stay/guide! 8-)
Excuse me, ma'am...but you've got extremely nice legs!!!...what time do they open???                                                                                                               https://www.youtube.com/watch?v=n8tCgN3aryQ

Offline jBernard

  • Sr. Member
  • ****
  • Posts: 299
Re: '09 500AF build
« Reply #174 on: October 18, 2015, 11:22:17 AM »
ha. thanks!
when I get to a final version i'll get it printed on a high end machine in nice plastic, will look like a off the shelf part, and in black of course and not blue!
'09 KX500AF - never ending project
'14 KTM 300SX

Offline bloudin

  • Newbie
  • *
  • Posts: 1
Re: '09 500AF build
« Reply #175 on: October 28, 2015, 07:49:18 AM »
This build it beautiful, however what are the chances of you being able to copy the mechanical drawings of the yoke and mounts so i can send them to my friend who has a CNC machine? I can send a big thumb drive if that works. I know you have put a lot of time into the project and i would be willing to send some Cheddar with the thumb drive. Thanks for you time and this bike will decimate all!

Offline jBernard

  • Sr. Member
  • ****
  • Posts: 299
Re: '09 500AF build
« Reply #176 on: October 29, 2015, 07:11:04 AM »
This build it beautiful, however what are the chances of you being able to copy the mechanical drawings of the yoke and mounts so i can send them to my friend who has a CNC machine? I can send a big thumb drive if that works. I know you have put a lot of time into the project and i would be willing to send some Cheddar with the thumb drive. Thanks for you time and this bike will decimate all!

Bloudin,
Thanks for the kind words, greatly appreciated!
In regards to the files, i'm kind of on the fence about that as you could imagine.
There's a guy on ebay selling yoke and frame kits that are already made, so letting go of those raw files where someone could pretty easily sell my design, even though its not rocket science in the slightest, would be a bit hard for me to let happen.

On the upside, I'm sending these new rail designs off shortly to get made up, and since I designed the yoke a while back, I've had a number of people ask me if I had any more made up as they would like to purchase some. I will probably make up around 5+ sets of yoke and rails available to people coming up soon. If that interest you at all. Let me know what you think.
Thanks again
Taylor
'09 KX500AF - never ending project
'14 KTM 300SX

Offline jBernard

  • Sr. Member
  • ****
  • Posts: 299
Re: '09 500AF build
« Reply #177 on: November 12, 2015, 03:59:56 PM »
Hey guys,
Sat down in some free time I finally had and made some revisions to all the designs of the HPSD mount, rear brembo adapter, frame rails, and yoke.

GOOD NEWS though. I've had numerous people reach out and want me to make them a Yoke, rails, or other things. And its just real hard to get one single part machined up, but I'm planning on running a set of the yokes, as well as the rail system, so people can use this method and save a lot of time hopefully! So stay tuned on that, and feel free to post in here, or shoot me a PM if its something that you'd be interested in, and I can take down your email and hit you up when things start getting close to in my hands!

Here are some revised parts.
I added a few more visual changes to the yoke, so it wasn't so 'blocky' on the front side, as well as trim off some un-needed material to give me area to get a nice weld seam to the frame to.


I revised the rear master cylinder mount, so I could use button head bolts instead of hex head, this will alloy me to mount the adapter flush with the side of the frame (like stock) yet recess the bolt heads (not like stock) so they don't wear your boots out and wear over time which in turn makes them easy to strip.


Revised the HPSD, added a nicer looking fillet to the top so it wasn't so blocky as well.


Well, I ran some diagnosis tools, and a SOLID billet rail system is slightly heaver than tubing, to say the least. Since I'm wanting to shave weight on this bike, I spent a lot of time putting in some weight relief pockets in the rail system, while still having .500" wall thickness at any given area, and having no square corners for better stress distribution. Added a little meat around the engine mount areas as well, so I didnt have to worry about welding around the pockets.


Same idea on the bottom offset adapter, took out the middle relief pocket so all the weld seam would be attached to solid billet and be easier to weld.


Really excited to have these in the works now. Should be finalizing manufacturing here within the next day or so, and then have a week or so of downtime in getting them made, then once in hand this bike will start looking like a bike again. This time, a bit better engineered!

« Last Edit: November 12, 2015, 04:10:46 PM by jBernard »
'09 KX500AF - never ending project
'14 KTM 300SX

Offline jBernard

  • Sr. Member
  • ****
  • Posts: 299
Re: '09 500AF build
« Reply #178 on: November 22, 2015, 04:40:01 PM »

Hey guys, quick update!

Got my front brake master cylinder back in from Cerakote'ing.
Looks pretty awesome! Its a nice thin finish like anodizing, so it came real close to matching the brembo clutch master.
I wish i could have afforded a real Brembo factory front brake master, but they are like 700$+ and I think brembo sxs caliper + 280mm tsunami galfer rotor is going to be WAY overkill for me in the braking department.


and color i was trying to match:


Also dont know if I posted pictures of the tank i got to fit up with a bit of persuasion. Its a '14 KX450f tank, had to modify the tail end of it, as it didn't clear the frame spar, but will easily be able to be filled in and get a nice solid mold from this.
The Acerebis Flo Green plastic kit (12-15 kxf) fits up perfect to it and surprisingly to the stock mount point behind the radiator on the frame. Got a nice year upgrade for very little work, now it looks like a '15!


Note:
I'm about to pull the trigger on getting the newly revised yoke and frame rails CNC'd. I'm contemplating getting 5 sets made as some people have spoken out they'd like a kit.
I haven't set a price in stone yet, but the only other kit out there is that CP conversion guy for the CR's only and his is 310$ just for the yoke and some crappy engine mounts. Pricing wise, mine would be considerably a better deal figuring its a CNC billet yoke AND rail system.

It would be a decent amount of cash out of pocket for me, so please let me know if you'd be interested in a kit ASAP!

Please shoot me a PM or email me at:
txfrc0 +AT+ gmail dot com  (replace the +AT+ with an @)


more updates soon!
Thanks
Taylor
'09 KX500AF - never ending project
'14 KTM 300SX

Offline Foxx4Beaver

  • Hero Member
  • *****
  • Posts: 8,952
  • James Stewart DID NOT invent the scrub!!..JoJo
Re: '09 500AF build
« Reply #179 on: November 23, 2015, 12:37:19 AM »
lookin great, as usual! 8-)
Excuse me, ma'am...but you've got extremely nice legs!!!...what time do they open???                                                                                                               https://www.youtube.com/watch?v=n8tCgN3aryQ